

Decluttering can feel overwhelming when you look at the whole house at once. Breaking the job into single-room projects makes the process manageable, faster, and more likely to stick.
This guide walks you through a clear, room-by-room approach with practical steps, storage suggestions, and simple systems you can implement today.
1. Start with a plan and a timer
Set realistic goals: pick one room, give yourself a time block (30–90 minutes), and decide on measurable outcomes (clear surfaces, donate bag, sorted drawers). Use a timer to keep momentum and avoid perfectionism—progress beats endless tweaking.
2. Quick triage: sort, not perfect organizing
Begin every room with a triage process: make four piles—keep, donate/sell, toss, relocate. Use lightweight containers to move items quickly between rooms. For sorting and temporary holding, consider sturdy multi-purpose bins like NETANY Plastic Storage Baskets that are easy to carry and stack while you work.
3. Bedroom: clear the surfaces and reclaim storage
Start with surfaces: nightstands, dressers, and the top of the wardrobe. Make the bed to instantly change the feel of the room. For items under the bed, use rolling, labelled containers that keep seasonal clothes and extra linens tidy and accessible—an under-bed solution such as LAMU Under Bed Storage makes this easy and keeps things off the floor.
4. Closets and shoes: edit, then organize
When tackling closets, do a purge seasonally. Ask three questions for each garment: have I worn it this season, does it fit and flatter, is it damaged? For shoes, clear, stackable boxes help you see inventory and free floor space—clear organizers like Clear Shoe Storage Boxes work well in small closets and under beds.
5. Kitchen: consolidate, label, and streamline
Empty counters first—only return items you use daily. Group like items (bakeware, prep tools, small appliances) and evaluate duplicates. For pantry staples and leftovers, airtight containers increase shelf life and make inventory simple; sets like Food Storage Containers are ideal for meal prep and clear labeling.
Use vertical and modular organizers for pots, lids, and pans to reclaim drawer and cabinet space. A dedicated lid rack prevents the frustrating pileup of lids and keeps pans stacked neatly—consider a durable option such as the Housolution Pot and Pan Lid Organizer for an immediate cabinet upgrade.
6. Bathroom: clear counters and corral small items
Bathrooms quickly become cluttered with single-use items and expired products. Clear out toiletries first—discard anything past its use-by date and consolidate duplicates. Keep daily-use items in reachable spots and store extras in a cabinet or a shower organizer. If you need a compact, reliable option to keep bottles off the tub edge and within reach, a simple Shower Caddy can transform bathtub and sink clutter into order.
7. Home office and paperwork: short sessions, clear systems
Paperwork is best handled in short, focused bursts: sort into action categories—respond, file, shred, recycle. Create a shallow inbox for new items and schedule weekly 15–30 minute maintenance sessions. For drawers and small tool storage, compact organizers keep supplies accessible without chaos—consider a drawer system like the MapleGrace Bamboo Drawer Organizer for pens, receipts, and small tech accessories.
8. Storage rooms, garage and seasonal items
For garages and utility closets, clear everything off shelves and assess what you use. Group items by activity (garden, car, sports) and store in labeled bins on sturdy shelving. Heavy-duty shelving units provide safe, organized storage and make future upkeep simple—invest in industrial-grade racks like the 71.3″ W Metal Storage Shelves to maximize vertical space and durability.
Quick declutter checklist
- Set a timer for each room (30–90 minutes).
- Create four piles: keep, donate/sell, toss, relocate.
- Clear flat surfaces first (beds, counters, desks).
- Group like items before returning them to storage.
- Label containers and keep daily items within reach.
- Schedule brief weekly touch-ups (10–15 minutes).
FAQ
- How long should I spend on each room? Aim for 30–90 minutes per session; adjust based on room size and how much buildup there is.
- What if I can’t decide about an item? Use a 6–12 month rule: if you haven’t used it in that time, consider donating. Put undecided items in a sealed box with a future review date.
- How do I prevent clutter from returning? Add simple daily habits: five-minute tidy each evening, one small donation box in a closet, and weekly reset sessions for high-traffic areas.
- Where should I store seasonal items? Keep them in labeled, stackable containers and store them in under-bed bins or high shelves to free daily-use space.
- When is it time to buy organizing products? Only after you’ve purged. Buy storage that fits the remaining items—measure before purchasing to avoid bringing in more unnecessary stuff.
Decluttering one room at a time removes overwhelm and creates visible, sustainable change. Start with a clear plan, use simple sorting systems, and invest in a few functional organizers to keep progress in place. Commit to small, regular maintenance and your home will stay calmer and more usable.
Products Featured in This Article
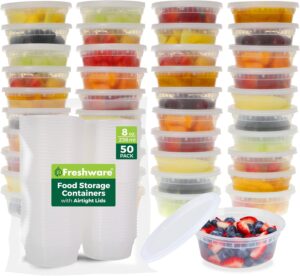
Freshware Food Storage Containers […
Stay Fit And Healthy – Enjoy Nutritious Homemade Meals Everywhere With The #1 Food Storage Containers…

Housolution Pot and Pan Lid Organiz…
Product description The video showcases the product in use.The video guides you through product setup.The video…

NETANY Plastic Storage Baskets R…
Product description PRODUCT CONFIGURATION: 8 woven pattern plastic baskets, gray. Dimensions:10.6” L x 7.2” W x…

Clear Shoe Storage Boxes, 6 Pack St…
A Closet Display That Feels Put Together: Turn loose pairs into a clean, boutique-style shoe wall….

LAMU Under Bed Storage with Wheels,…
Product description 1 Under the Bed 2 Under the Sofa 3 Under the Crib 4 Under…

MapleGrace Bamboo Drawer Organizer …
From the brand MapleGrace Drawer Organizers We create natural, clean and tidy life for you. Maplegrace’s…

71.3″ W Metal Storage Shelves…
From the brand Metal Garage Storage Cabinets Metal Garage Storage Cabinets Heavy Duty Shelving Metal Wardrobe…
